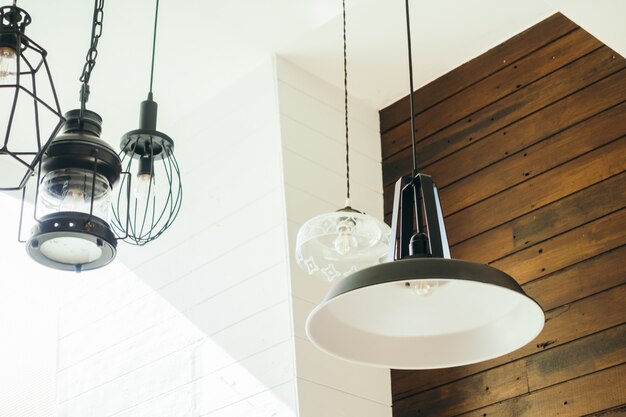
One of the most transforming components of home design is lighting, which can refresh the atmosphere, improve usability, and give any area a modern feel. In addition to delivering effective and uniform illumination, recessed lighting—also known as can lighting—offers a simple, minimalist look.
Recessed lighting may make all the difference, whether you’re remodeling your house or just renovating it. To guarantee that you receive the ideal lighting configuration, this guide will take you through every stage of the installation process, emphasizing safety precautions, best practices, and financial considerations.
Quick Overview: Key Details for Installing Recessed Lighting
| Category | Details |
|---|---|
| Project Type | Home Lighting Remodel |
| Best For | Ambient, Task, and Accent Lighting |
| Key Materials | Recessed Can Housing, LED Bulbs, Wiring, Ceiling Template |
| Installation Time | 3-5 Hours (DIY) |
| Average Cost Per Fixture | $100 – $500 (Including Labor) |
| DIY Difficulty Level | Moderate to High |
| Professional Installation Cost | $800 – $2,500 for a Full Room |
| Best Locations | Kitchens, Living Rooms, Hallways, Bathrooms |
| Energy Efficiency | LED Recessed Lights Reduce Energy Use by 75% |
| Source | Home Depot Lighting Guide |
Recessed lighting: why choose it?
Recessed lighting is a design statement as well as a means of illumination. Can lights are flush with the ceiling, unlike large overhead fixtures, giving them a sleek, unobtrusive appearance that makes the most of available space and improves visibility.
Principal Advantages of Recessed Lighting
✅ Compact: Perfect for contemporary spaces with low ceilings.
✅ Adaptable: Comes in a range of beam angles, trims, and brightness settings.
✅ Energy-Efficient: Recessed LED lighting significantly lowers electricity usage.
✅ Raises Home Value: Proper lighting placement makes a property more appealing to prospective purchasers.
✅ Flexible Installation: Fits in living rooms, hallways, bathrooms, and kitchens.
A Comprehensive Guide to Recessed Lighting Installation
Step 1: Make a Lighting Layout Plan
Determine the locations of each light before making any cuts. Mark the locations on the ceiling using a template that was supplied by the manufacturer. To prevent shadows or dark areas in the space, make sure the spacing is uniform.
🔹 Expert Tip: Recessed lights should be spaced roughly half the height of the ceiling. For example, lights must be spaced 4 feet apart to provide the best coverage for an 8-foot ceiling.
Step 2: Examine the wiring and ceiling structure
Installation is simple if there is an attic above. If there is another floor above, shallow housing fixtures would be necessary for confined spaces. Before moving forward, make sure your electrical circuit can support the extra watts.
Step 3: Cut Openings and Turn Off the Power
Before working with wires, turn off the electricity at the circuit breaker. Then, using a drywall saw, make holes in the ceiling according to your indicated template. If you are replacing an existing fixture, gently remove it to reveal the wiring.
Wire the fixtures in step four
To prevent loose connections, make sure the ground, neutral, and hot wires are securely fastened. For enhanced safety, use electrical tape and wire nuts. 🔹 Strip the electrical wires and attach them to the new light housing.
⚠ Safety Tip: To guarantee adherence to current electrical rules, seek advice from a qualified electrician if your house has antiquated aluminum wiring or no ground wire.
Installing the Light Housing in Step Five
Using the integrated mounting clips or screws, secure the fixture after pushing the housing into the ceiling hole until it lies flush. Before completing the placement, adjust the angle for uniform light distribution.
Step 6: Test the lights and put the bulbs in
To save power, choose LED bulbs that use less energy. Restore power at the breaker and use the wall switch to test the lights. If required, make adjustments to the wiring connections or placement.
✨ Bravo! Recessed lighting has been installed successfully! ✨
How Much Does Installing Recessed Lighting Cost?
Materials, labor, and ceiling accessibility are some of the variables that affect the overall cost of installing recessed lighting.
LED Bulbs’ Energy Saving PotentialEnergy Use Reduction of Up to 75%
💡 Expert Advice: Setting up several lights? The cost of installing each fixture is decreased by electricians’ frequent bulk pricing.
Is It Better to Hire an Electrician or Do It Yourself?
Do It Yourself If
You know how to use simple tools and electrical wiring.
There is simple access to your ceiling (for example, an attic above).
You feel comfortable cutting and wiring in a safe manner.
⚠ You should hire an electrician if
Your ceiling needs new wiring or is hard to reach.
You don’t know what electrical safety codes are.
The wiring in your house has to be upgraded because it is outdated.
Selecting Appropriate Recessed Lighting for Your House
Recessed light types
1️⃣ Baffle Trim: Ideal for general illumination, it reduces glare.
2️⃣ Eyeball Trim: A rotating design that draws attention to architectural details or artwork.
- Gimbal Trim: directed lighting with tilt capabilities that can be adjusted.
4️⃣ Shower Trim: Perfect for bathrooms, waterproof design.
5️⃣ Canless LED Recessed Lights: Stylish, ultra-modern lights that require less depth in the ceiling.
The Best Recessed Lighting Bulbs
💡 LED Bulbs: The most durable and energy-efficient choice. Warm, brilliant light is produced by halogen bulbs, although they use more energy.
💡 Smart Bulbs: Options with Wi-Fi provide personalized color and brightness control.
Make Your House Look Better Using Recessed Lighting
Recessed lighting gives any room a sleek, contemporary appearance that instantly improves it. Can lights offer a smooth, cost-effective alternative for lighting a corridor, adding brightness to a kitchen, or renovating a living room.
💡 Pro Tip: For a personalized lighting arrangement plan, speak with an electrician or visit a nearby lighting store if you’re not sure where to begin.
Visit Home Depot’s Lighting Guide for professional remodeling guidance and lighting ideas. Cheers to renovations! ✨


